Spatial Integration takes inspiration from the gaming world, using the full window to display what you want to see – your data. Control menus fly in from the sides when requested by bumping the mouse pointer against the edge of the window.
The left side menu allows you to manipulate data, layers and visualisations. The right side menu provides access to tools and settings. There is a thin status bar across the bottom of the window that shows information such as current pointer location, coordinate reference system, pending actions and log messages.
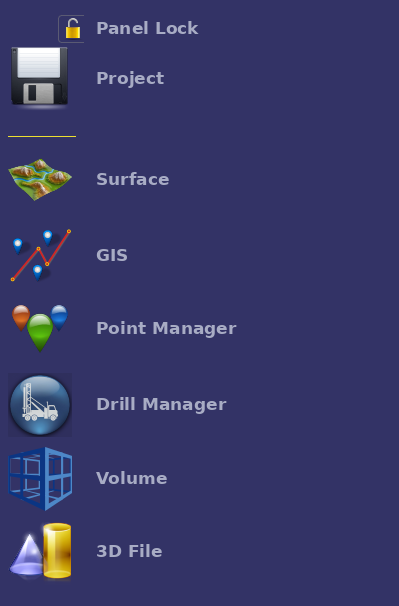
Data Flyout
- Panel Lock: Prevents the flyout from closing when the mouse leaves.
- Project: Manage your project – open and create projects, create SI Packages etc.
- Surface: Manage surfaces, usually elevation models with image overlays or manually placed images.
- GIS: Load and display GIS files from a range of formats (eg geopackage, shapefile).
- Point Manager: Manage and display point data that has been imported into the Project.
- Drill Manager: Manage the drill hole database, import drilling and display drilling data.
- Volume: Load and display block models and other volume data.
- 3D File: Load and display objects from a range of 3D formats.
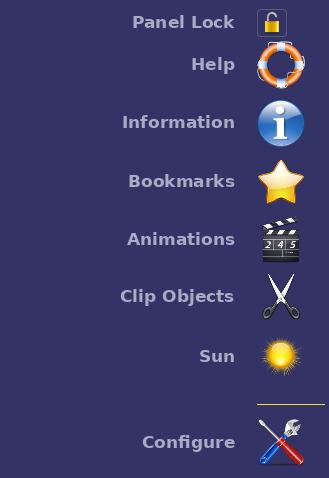
Tool Flyout
- Panel Lock: Prevents the flyout from closing when the mouse leaves.
- Help: Show the Help contents page.
- Information: Toggle the Information tool on and off, and manage information callouts.
- Bookmarks: Manage bookmarks.
- Animations: Manage animations, both user defined and External file defined.
- Clip Objects: Manage multiple clipping objects such as clip sections and planes.
- Sun: Change sun angle and lighting characteristics.
- Configure: Manage various configuration options.
Status Bar
The right hand end of the status bar carries buttons for the tools that are used while looking at the scene. From left to right they are:

- Legend: Toggle the legend on and off.
- Measure: Toggle the Measure tool on and off.
- Screenshot: Save an image of the current view.
- Graticule: Toggle the reference grid on and off.
- Perspective: Draw the scene with a perspective camera.
- Orthographic: Draw the scene with an orthographic camera.
To the right of the buttons is the message icon, which shows log messages, and the coordinate reference system of the project.