
The Information tool tells you what you are looking at. Point at anything in the scene and a small window follows the mouse, showing the details of whatever is under the pointer. Click, and that window is pinned to the screen as a permanent callout joined to the point by a line, ready to be edited into an annotation with your own text and images.
Callouts are saved with your project, so the notes you make on a scene are still there the next time you open it.
Turning the Tool On and Off
Toggle the Information tool using the i button in the tools menu along the right edge of the screen, or by pressing the I key.
The button stays highlighted while the tool is active. Turning the tool off closes the window that follows the mouse and stops clicks creating new callouts, but it does not remove the fixed callouts you have already placed.
Dynamic Information
While the tool is active, a window follows the mouse pointer and updates continuously as you move it across the scene.
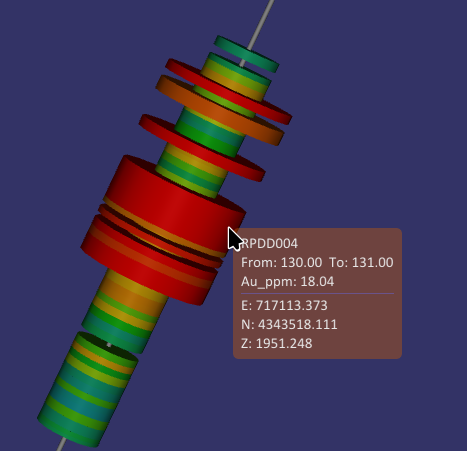
The content changes to suit whatever the pointer is over, so you always get the information that makes sense for that object.
Most entries finish with the real world position of the point under the pointer, given as easting, northing and elevation, or as longitude, latitude and elevation when the viewer is using a geographic CRS.
If the pointer is not over anything, the window disappears until it finds something again.
Creating a Fixed Callout
Click on the scene while the tool is active to turn what you are looking at into a fixed callout.
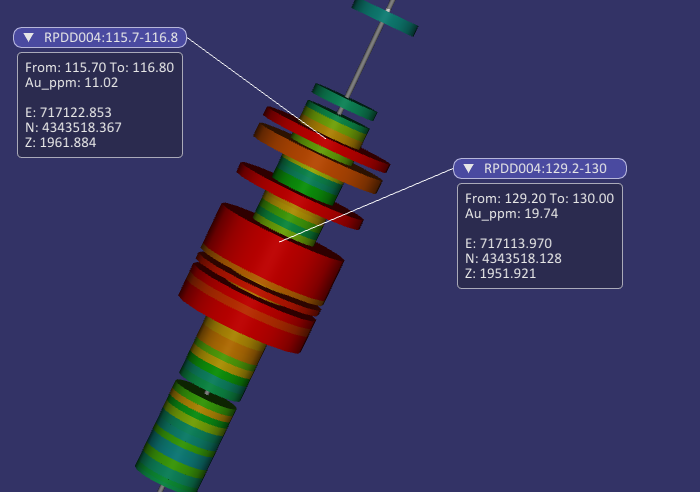
A fixed callout is filled with the same information the dynamic window was showing.
Each callout is drawn as a titled window with a line running from its title bar to the point in the scene it describes. The window stays at a constant position on the screen while the line follows the point through the scene, so the callout stays legible as you orbit and zoom rather than sliding around and overlapping the data. The line attaches to whichever side of the window is closest to the point, so it swaps sides as you move the view around.
Drag the title bar to move a callout to a tidier position. Click the arrow at the left of the title bar to roll the callout up to just its title, and click it again to expand it. Positions are saved with the project.
Editing a Callout
Right click a callout to reveal three buttons:
- The eye button hides the callout. It is not deleted, and can be shown again from the Information Manager.
- The pencil button switches the callout into edit mode.
- The trash button deletes the callout permanently.
In edit mode the callout expands to show its contents as editable fields.
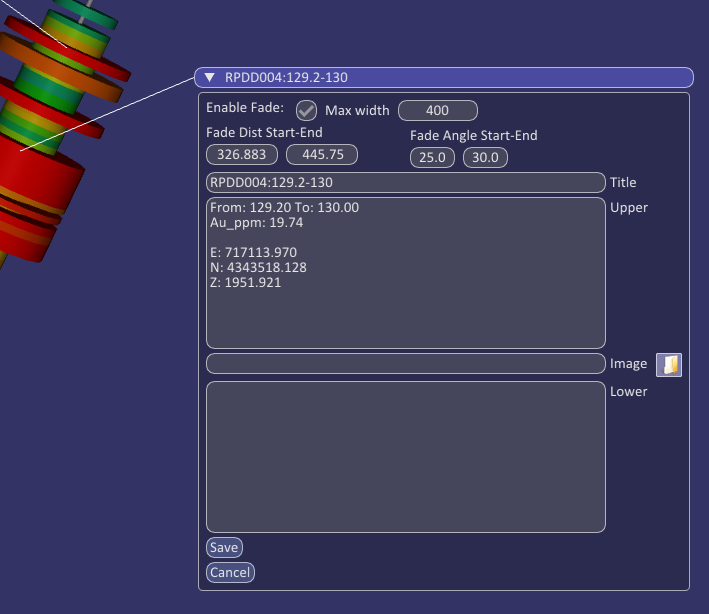
The text of a callout is made of three parts, all of which can be changed:
- Title is the single line shown in the title bar of the callout, and is also the name it is listed under in the Information Manager.
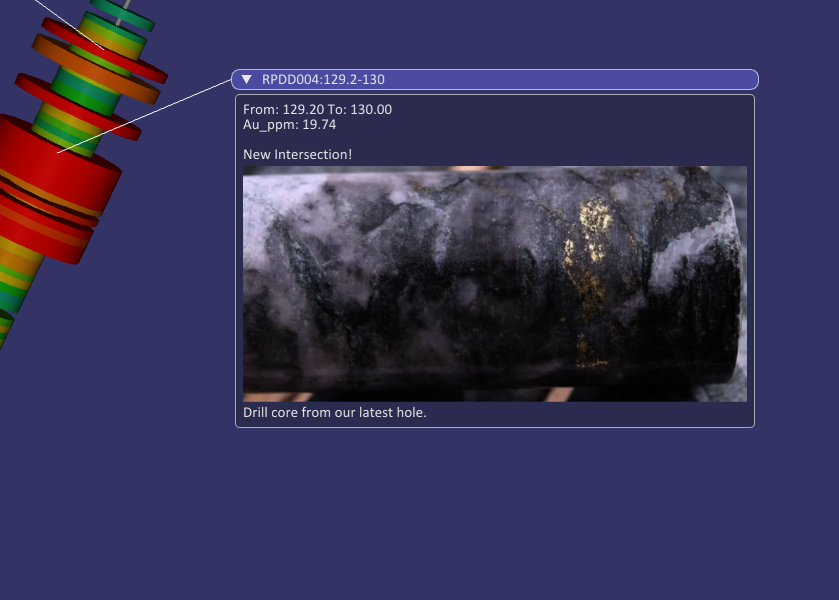
- Upper is the block of text shown above the image. This is where the automatically generated information is placed when the callout is created.
- Lower is the block of text shown below the image.
Either text block can be left empty, in which case it is simply not drawn. Both accept as many lines as you like.
Image holds the path of a picture to display between the upper and lower text. Type the path in directly, or use the browse button beside the field to choose the file. The image is scaled down to fit the width of the callout when it is wider than the callout, and drawn at its own size when it is narrower.
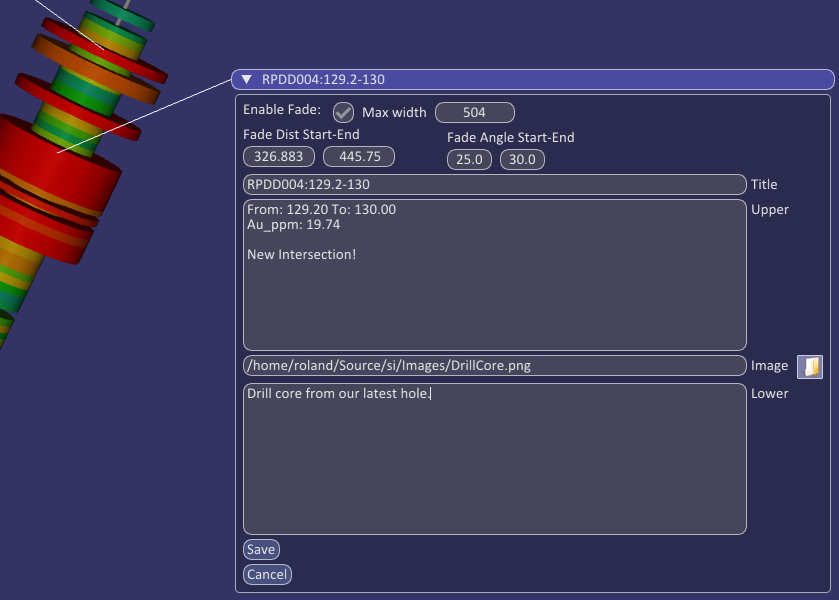
Click Save to keep your changes and return the callout to its normal appearance, or Cancel to discard them.
The result is a callout carrying your own commentary and photograph alongside the data it points at.
Width
Max width sets the widest the callout is allowed to be, in pixels. Text wraps at this width and images are scaled down to it, so it controls both how wide the callout is and how tall a block of text becomes. Drag the value left and right to change it, or double click it to type a number.
Use a narrow width for short notes so they stay out of the way, and a wider one when a callout carries a photograph or a long description.
Fading
A scene with many callouts becomes cluttered, particularly when you zoom out and callouts belonging to distant objects pile up on top of each other. Fading solves this by letting each callout disappear when it is no longer relevant to the view.
Tick Enable Fade to turn fading on for a callout. It is on by default.
Fading is controlled by two pairs of values:
- Fade Dist Start-End is how far the callout’s point is from the camera. Nearer than the first value the callout is fully drawn; between the two values it fades out; beyond the second value it is not drawn at all. When you create a callout these are set from the distance you were viewing it at, so it stays visible around the range you made it at and drops out as you pull back.
- Fade Angle Start-End is the angle between the direction you are looking and the direction of the callout’s point, in degrees. Inside the first angle the callout is fully drawn; between the two angles it fades out; outside the second angle it is not drawn. This clears away callouts that belong to things off at the edge of the view.
Both effects apply together, and the connector line fades with the callout. A callout being edited is never allowed to fade away completely.
Set the values by dragging them left and right, or double click one to type a number. The start value is always kept below the end value.
Information Manager
The Information Manager lists every callout in the project in one table, which is the easiest way to work with them once you have more than a handful. Select the Information Manager… menu to open it..
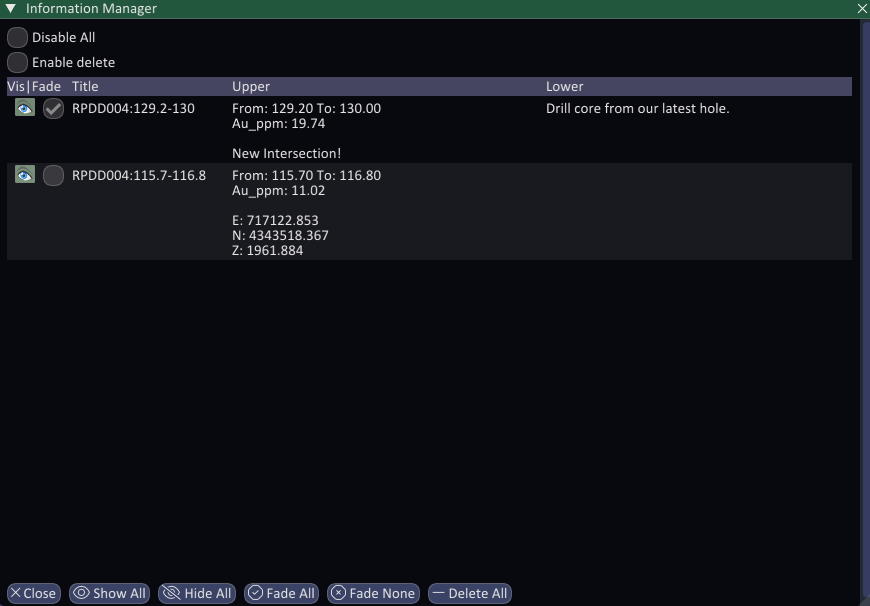
The table lists the title, upper text and lower text of each callout. Hover over a row to highlight the title bar of that callout in the scene, which is a quick way to find where a note is when the view is busy. Hover over a text cell to see the whole of it as a tooltip when it is too long for the column.
Each row has two controls at its left:
- The eye button shows or hides that callout.
- The tick box turns fading on or off for that callout, exactly like Enable Fade in the callout editor.
Above the table are two settings:
- Disable All temporarily hides every callout in the project at once, without changing any of their individual settings. Use it to clear the view for a screenshot or a discussion, then untick it to bring them all back. The setting is saved with the project.
- Enable delete adds a trash button to each row. It is deliberately kept behind this tick box so a stray click cannot destroy a note.
The buttons along the bottom act on every callout at once:
- Show All and Hide All show or hide all callouts.
- Fade All and Fade None turn fading on or off for all callouts.
- Delete All deletes every callout in the project. You are asked to confirm first.