
A video tutorial is available for this topic.
When images don’t fit onto an elevation surface and you need to put them at an arbitrary location, you use the Place Image facility located under the Surfaces menu. These could be drafted or scanned geology sections, scans of old mine workings or geophysics sections, or any other image or photo you might have. Placed images use the same paging system as elevation surfaces, so you can use images of any size and resolution and most formats.
Select the Place Image menu, then choose your image.
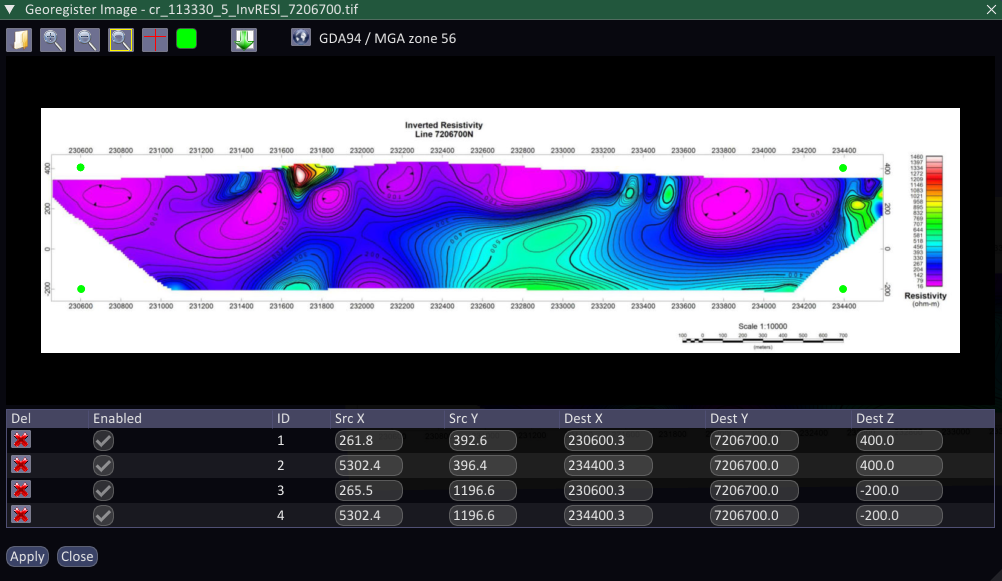
You might want to turn on cross hairs using the button with two red lines to help place control points. This is particularly useful if the image doesn’t have a full grid, but does have grid coordinates around the frame.
You can zoom in and out or fit the image to the window using the buttons at the top. You can also zoom using the mouse wheel and pan by dragging the image with the left mouse button.
If you have control points in an existing gcp file, then you can load those points using the green down arrow button.
Set the coordinate reference system for your control points at the top of the dialog. If Spatial Integration is already aware of a local grid, then this can be used and often makes registering images much quicker and easier.
Double click to put a control point at a known location. You can then enter the coordinates in the table. Repeat the process for at least 4 points. Control points should be well spread and close to the corners for best results. Remember that it may be easier to copy and paste coordinates using Ctrl+C and Ctrl+V.
When you’re finished, click the Apply button and the image will be placed in your scene.
The ground control points are written to a file with the same name, but a .gcp extension, as well as in your project file.
If the image is large, Spatial Integration will automatically create overviews for you. These are stored with an .ovr extension.
You can adjust the position of your image by double clicking the layer to open the Surface dialog, then clicking on the Image tab. From there, click the configure button and choose Georeference.
Make any corrections by dragging the ground control points in the image window or editing coordinates in the table. Click the Apply button when you’re finished and the image position will be updated in the scene.
Make sure you save the project to make the updates permanent.