
A model is typically a self-contained 3D object with its own textures, normal maps, colours etc. It’s designed to be used without modification, except for location, rotation and scale. Models can be purely decorative, but can also be spatially specific, such as a 3D representation of a factory.
When Spatial Integration loads a model it will attempt to honour all the embedded textures, animations and colours as well as possible. SI also gives you the option to make copies of the model after it is loaded.
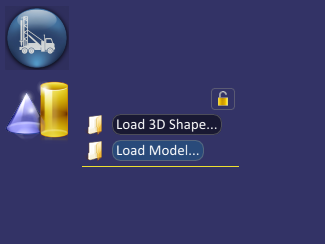
Load a model using the menu below:
The Asset Settings dialog below will be displayed. First, select your file. The layer name will be automatically suggested using the filename, but you can change it here if desired. We suggest keeping the layer name short, but meaningful.
Multiple file selection is supported using the CTRL and SHIFT keys in the usuall way. If you select multiple files then the layer names will be assigned automatically using the file names and can’t be defined here during the inital load.
Models use their own coordinate systems. This can be anything, for example: 0 to 1, scaled in metres from a corner 0.0 to 42.0, or could be the real life CRS coordinates of a modelled building. Spatial Integration can handle all possibilities using the options below.
Place at Scene Centre
Check this box if your model uses arbitrary coordinates and you want to place it at a point in your scene. This will place the 0, 0, 0 coordinate of the model at the current scene centre, which can be set using the middle button of the mouse. Note that the actual model might not display at that point if the model was not created around 0, 0, 0 in whatever arbitrary coordinate system it uses. You can fix this using the Hotpoint Offset below.
If your model was created using the correct coordinates for the CRS of your scene, then uncheck this box.
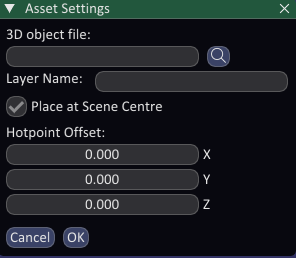
Hotpoint Offset
It is more convenient when placing models in your scene to have them built around a 0, 0, 0 origin that makes sense to you. When placing an animal, for example, the origin should be the horizontal centre of the animal in line with the bottom of the feet. For a building you might want the origin to be the front door at the base. This is especially important when rotating a model because it will be rotated around the origin. The Hotpoint Offset allows you to shift the origin of the model to a convenient place.
If you know the Hotpoint Offset, you can type it in directly when you first open the file. More typically, you leave it at 0.0, load the file, then adjust the values while watching the model move in the scene. The steps for this are as follows:
- Right click the scene where you want your model to be placed.
- Load the model with Place at Scene Centre selected and the Hotpoint Offset left at 0.
- Zoom out or click the Find button on the layer flyout menu to see where the model is rendered.
- Double click the model in the flyout menu to re-open the Asset Settings dialog
- Click and drag the X, Y and Z Hotpoint Offsets (or type in the boxes) to move the model to where you want it displayed with respect to the placement point you previously set.
- You can move and rotate the model using the buttons in the Copies section of dialog to help get the desired offset
Copies
Once a model is loaded you can go back into the Asset Settings dialog to change options and make copies by double clicking the model in the Asset layer flyout menu. The dialog will now show a Copies section as below.
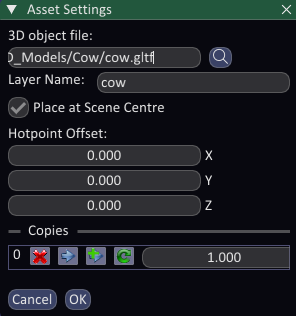
You can make a new copy of the model by clicking the Place new copy button then clicking, or click and drag, in the scene where you want it to go. This adds a line to the list of Copies.
You can move a copy by selecting the line in the list, clicking the Move button and then clicking, or click and drag, to the new location. You must clickthe move button again to get out of move mode.
A copy can be rotated by clicking the Rotate button then holding Left CTRL while left button dragging the mouse. This rotates the model around the Z axis. You can rotate around the X axis by holding Left SHIFT instead and rotate around the Y by holding the Left ALT button. Click the Rotate button again to get out of rotate mode.
Copies can be deleted using the Delete button.
Animations
If the model contains animations, then the animations will be presented in the Animations Tool from the right flyout menu. You can start and stop any animations from there. Note that animation will be synchronised for all copies. To use different or unsynchronised animations you need to load a new model layer.